Sunday, May 31, 2015

Final Exam

Do over: If given the opportunity, which project would you do over? Describe why and how you would redo this project. Reasons might include choosing a different theme, using a different medium or creating a different idea completely. Include photo.

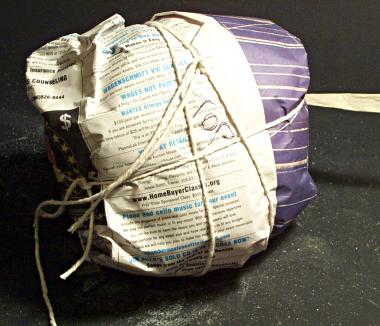
If I could do a project again, I would redo the foil saggar piece. I would redo this piece because I wasn't very happy with the look of the clay piece itself. Since it turned out to be very difficult to do what I wanted with it, I settled with a simplified version of my original idea, but it didn't look as nice as i'd hoped. If I were to redo this project, I would have made a larger and simpler piece like a vase so the texture from the foil saggar would stand out more. I would have also used the pottery wheel to make my piece since I have never used one before and want to use one at some point.


What is a technique you used in your artwork that worked well? Explain what technique it was and why it was successful.


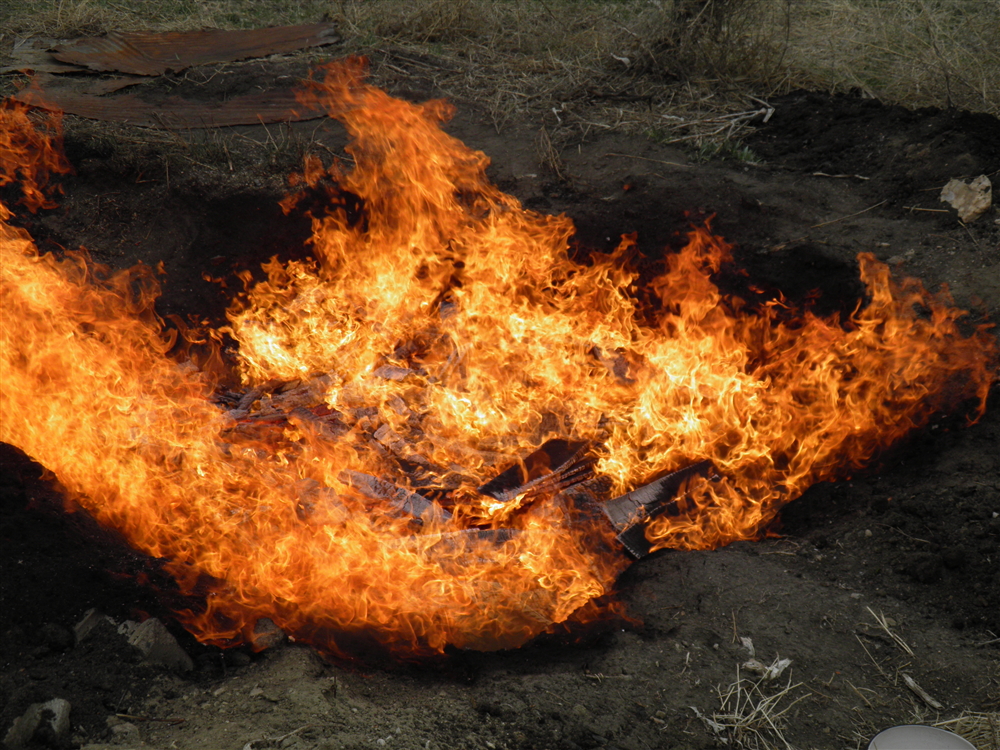
A technique that I used that worked well was melting the glass bottles in the kiln. I didn't think we would be able to do this at first because glass melts at a very high temperature, but the kiln gets hot enough to melt it. I really like the way that the glass didn't totally melt into a liquid, but it softened and folded in on itself. That made the piece look really cool because you can still see the texture in the bottles even after they've melted down flat over each other.You can also still see the separation of the bottles and the fold lines from where they melted.


Which project was your most successful? Describe the theme and or topic and the process you went through to complete the project.


My most successful project was my dwellings project. I hot-glued three art textbooks together and started cutting out pages to hollow the inside of the books and make them into a house. Even though it isn't finished yet, I really like the look of the door and windows in the front of the house and I think i'll really like it when the windows in the back of the house are done and you can see all the way through the books. It took a long time to cut through the books so I don't know how much farther i'm going to go with this piece, but if I finish it I think it will look really good.


Sketchbook: pick any warm-up from your sketchbook that you found beneficial, interesting or simply felt you handled well. Describe the activity and reason for selecting it above the others. Include photo.


The Illustration Friday I chose was the most recent one, Melt. The reason I chose this was that this was the first time I had drawn something transparent (an ice cube) and I feel that I learned a lot in doing it. I like looking at the piece as well because you can tell what it is immediately and your eyes can picture it in 3d. I feel like this is one of the best pieces I've done in pencil, even though it's small, because it is a piece that looks realistic and detailed.


Regardless of whether you liked or disliked a project, which one did you learn, grow, or developed the most from? Please explain.

The project that I learned the most from was the vessel piece. I learned the most from that because I made it by flattening out a piece of clay, then cutting shapes out of the clay, and cutting those clay pieces into a 3D shape. It was an interesting technique that I learned a lot about, and I think it went pretty successfully. This is a technique that I will probably use on the future while doing more things with clay.

Thursday, May 28, 2015

Foil Saggar Piece

The idea I had for the Foil Saggar piece was to make a bowl, but cut out the top to make it look like fire. When I tried carving out the top like this, it didn't shape like I wanted and just looked like the bowl had a jagged rim. I still wanted to incorporate fire so I carved the shape I wanted into the side of the bowl.

When the piece was fired, it added an interesting and random pattern of dark and light areas. I didn't really like how the project turned out, but that was because I didn't really like the clay piece I used to start with. If I did this project again, I would make a larger piece with less details in it so the foil saggar effects would be more pronounced.

Tuesday, April 28, 2015

Pit Firing

What is Pit Firing?
Pit firing is placing several clay pieces together in a pit, and lighting a large fire in that pit. The heat from the fire mixed with the gasses produced color the clay so it is an interesting mix of oranges, reds, and browns.


What is a Foil Saggar?
A foil saggar is created by wrapping a piece of ceramic in aluminum foil in order to keep stuff inside with the pottery to change the finish on the piece.


What is a Paper Saggar?
Same as above, but made out of a paper bag or cardboard that burns away during firing.


These techniques are special because they are using fire and heat to create color. Normally, if you wanted to color something, you would put paint or something  on it's surface. With pit firing, you are changing the color of the clay itself. It's also special because every piece made through pit firing is completely unique as the colors and patterns created are random.

Free Project

When we started our free project, I first had to think of a material to use. I thought first about cardboard, but then I remembered that I had several glass bottles at home. Glass would be an interesting material to work with because it is very brittle and hard to form. At first I wanted to cut the bottles in some way and use the pieces of glass to make a sculpture, but then Mrs. Sudkamp suggested trying to use the kiln to melt the bottles. I thought this was an interesting idea, so I started looking at pictures of melted bottles.

I finally decided on arranging several bottles in a certain way and melting them a little so they would slump together and make one single piece. The problem with this is that I needed to hold the bottles together while they were melting, without interfering with them after they had melted, and without melting before the glass and making the bottles collapse. The only thing I could think of which would do this is a clay base that would hold the bottles in place and not melt in the high temperatures. When the piece had cooled, I intended to remove the base and have the glass bottles sit on their own.

I had expected the glass to sink down a little bit, but it turned out that the glass melted completely flattened down and started dripping over the side of the base. This meant that I couldn't remove the base like I had wanted to, but it didn't matter that much to me because the piece looked really cool as it was. The one thing that I didn't like about it was that it had cracked in several places while cooling, including right through the middle, breaking the piece in half. I tried hot glueing the glass back together, but the broken glass was too smooth and the glue couldn't get a grip on the glass, so it just came apart again. So far, I haven't put the piece back together, but I plan to fix it once I bring it home.


https://www.pinterest.com/jamesleeder/free-material-sculpture/

Dwellings

I tossed around a few ideas for my dwelling project before I started it. the first thing I wanted to do was create a wire frame of a house, with only the outline, windows, and a door. I wasn't sure how I would design this project because I wanted to use a single, continuous piece of wire to make the whole thing and I didn't know if I wanted wire to double up anywhere. After thinking about that idea for a while, I decided to change to carving into books. I wanted to carve the windows and door into the front cover of the book, hollow out the middle, and put windows and a door on the back cover as well. I used three old art encyclopedias that had been hot glued together to make one really thick book. I thought about adding furniture inside for a while but decided against it as it would take too long to add small details inside. Just cutting out the pages was taking a long time. I underestimated the amount of time it would take to cut through nearly 1000 pages. hopefully, when i'm done, it will be worth it, though. The front of the house is already looking nice and you can't even see what the inside will look like yet.

Monday, April 13, 2015

Vessel

The point of my vessel project was to contain light, except for a certain gap which would let out light that spelled the word "Free." This was to symbolize that the light was being contained and only some of it could come out. To make this vessel, I used a flat, 1/4 inch sheet of clay and cut and curved the pieces from that to make the vessel. Then I used a clay knife to carve out the basis where light would come through to spell "Free." I had some trouble getting able to sculpt the inner layer while the outer layer was in place, so I had to cut a gap into the back of the piece. That way I could work inside the piece easily. It worked really well and only left small ridges in the piece when I replaced the gap I had made. I think this project went pretty well, even if I don't know if words line up properly yet since I haven't gotten to test out with an actual candle. I hope the words line up properly since I spent a lot of time carving them out!


https://www.pinterest.com/jamesleeder/vessels/

Friday, April 10, 2015

Animal Head

The animal head I made was the head of a squirrel. When I started working with my clay, I spent a lot of time adding moisture to my clay to make it soft and workable. That helped for the first few days, but after a few days the clay started drying out. That made it difficult to work with and I had to try several times to add the eyes. The eyes were a big issue for me during this project, and even by the end, I still hadn't made the eyes perfectly level. It was also difficult to add the ears because they were so thin and delicate. I then had trouble painting the head, because I couldn't get the color just right. I decided to add white streaks to add texture and I really like the way it finally turned out.

Thursday, March 19, 2015

Styrogami

I was not here the first day and did not do the styrogami project.

Tuesday, March 17, 2015

Inspired Artist

The artist that inspires me is Bob Potts. He is a sculpture artist who hand-builds kinetic structures that move with the elegance of a flying bird and a swimming fish. He was one of the creators of the M.A.D Gallery, which now has 2 locations, in Geneva, Switzerland and Taipei, Taiwan. The 72 year old is based out of an 1850's barn in New York State and hand-builds his amazing sculptures on his own. What inspires me is how he makes these mesmerizing pieces of art on his own. They are hypnotic to watch and very interesting to see the engineering behind them.


http://www.mbandf.com/mad-gallery/creators/bob-potts/

Tuesday, March 10, 2015

Relief

The hardest mini lesson was the cardboard relief because of the way it is structured. If you make a mistake, you can't fix it since you can't reform the paper.


I develop art making skills: clay was a material that I had briefly worked with in 3d, but never in 2d. Making a flat panel out of clay was something that I had no experience with and found interesting. One major thing I learned was that as clay hardened, it got easier to carve details into. When sculpting, you try to keep the clay as soft as possible to stop it cracking.


I take risks: while working on my second mini project, I tried to add texture to my fire by adding more layers. I knew that once I cut the cardboard, there was no way to put it back, but there was also no other way to see what it would look like.  I tried it, and found that I didn't like how our looked, so I tried adding more layers. Unfortunately, that didn't make it look any better, so I had to redo that project, but I learned what did and did not look good in cardboard which helped my in my final relief project.